Why bags fail
A bag fails at the same points every time. Those points are visible before you buy.
The strap gives quietly. Not a snap, not a tear. A soft list to one side, a buckle that won't hold, and one morning a shoulder strap that separates completely while you're moving through a crowd. The bag didn't break that morning. The construction failed the first week, at a point you didn't know to check.
Bags fail at attachment points. Not the fabric, not the zipper teeth, not the buckle. The seam where one component meets another, where load concentrates into an inch of thread. More construction is not always better construction. Every seam between the load and the anchor is another point of failure: another chance for delamination, thread rot, or migration under sustained weight. The bartack can be present and correct and the anchor can still fail if it's sandwiched through layers that aren't bonded directly to the bag's structure. Simpler handoffs, fewer intermediary layers, is often stronger than more construction that looks more serious.
Load is the variable. Every attachment point will eventually be tested by enough weight over enough time. What varies is how much margin the construction has, and whether that margin outlasts your use of it.
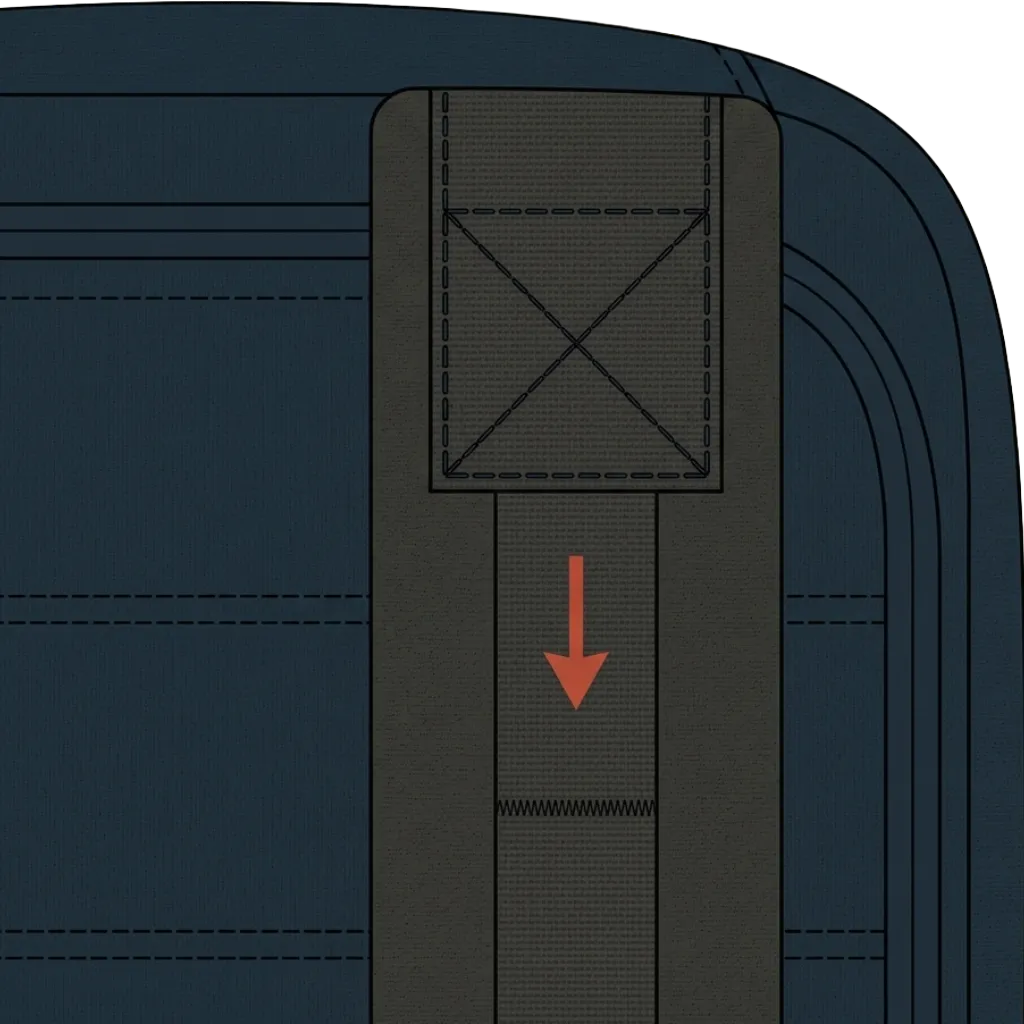
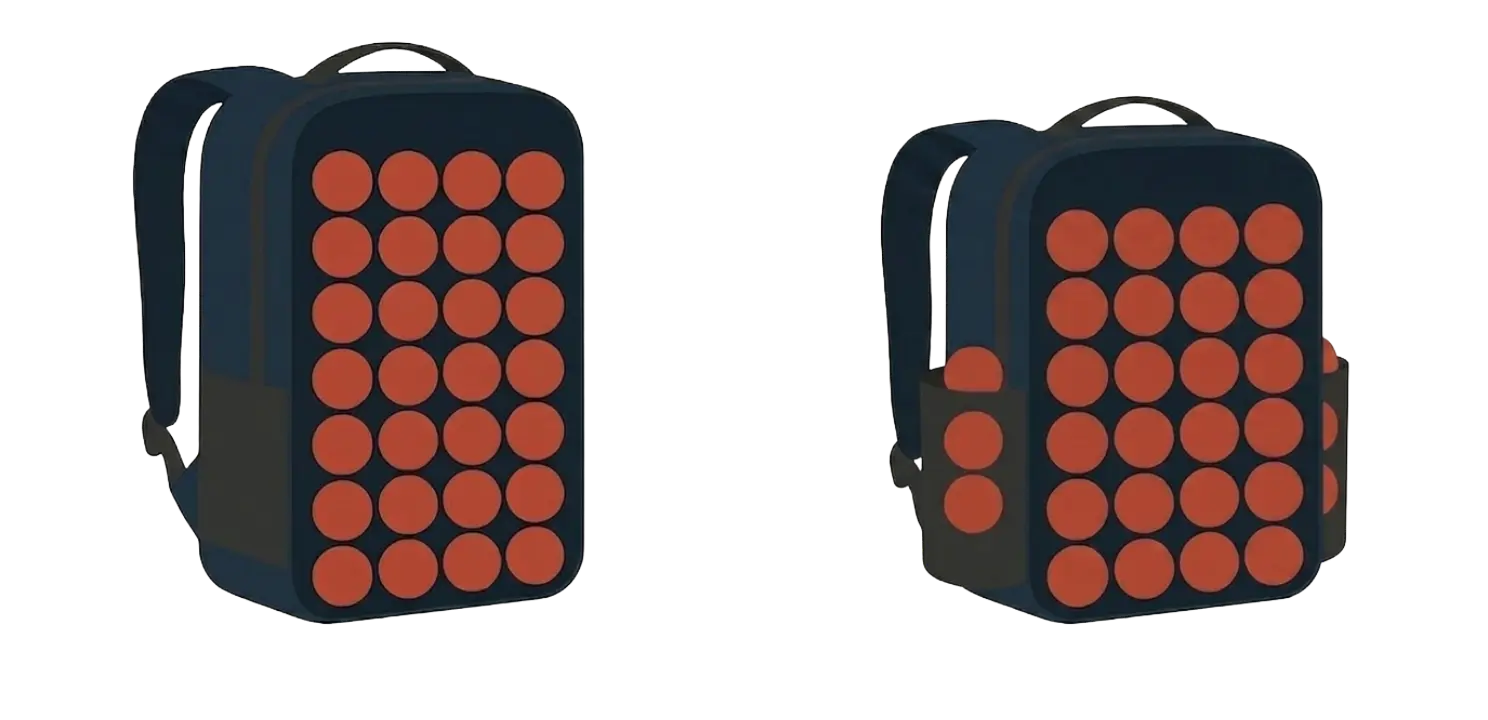
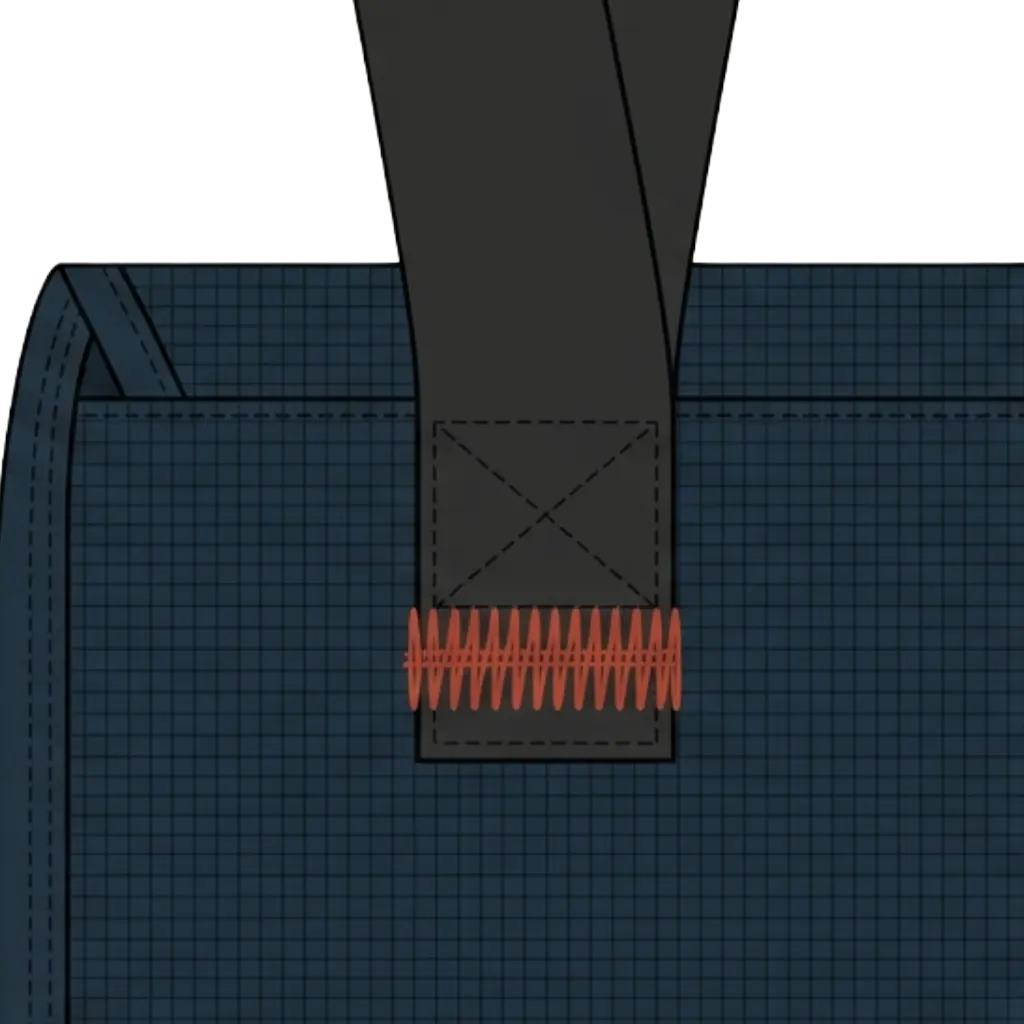
Upper shoulder strap anchors carry the highest load on the bag. Every pound you lift by the straps concentrates here. The reinforcement should be visible and distinct from the surrounding seams: bar-tacks or box stitching that looks structurally different from everything around it. A single standard stitch row at this point is not adequate construction. It is the most readable failure signal on any bag.
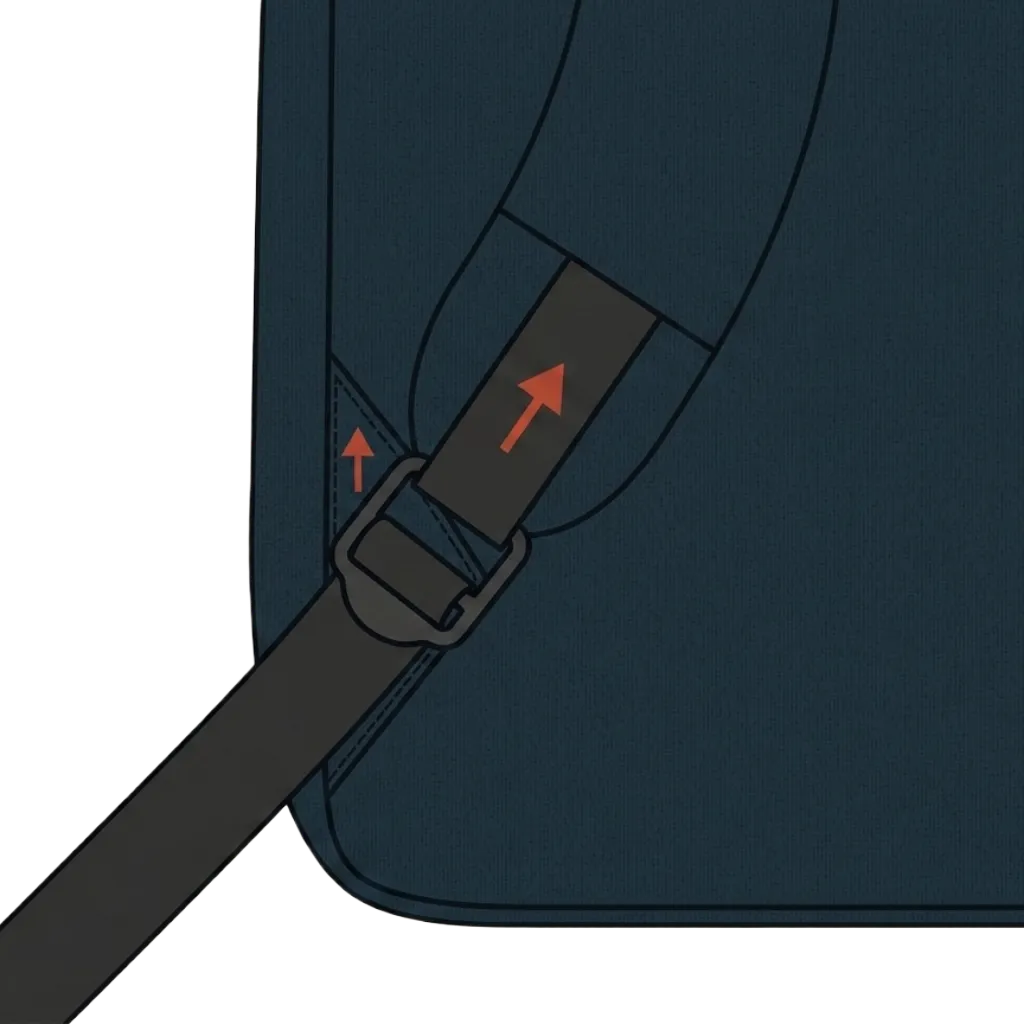
Lower shoulder strap anchors take a different load: lateral and rotational stress as the bag moves against your back. Trace the construction back to the bag body. The anchor should attach directly to the structure, not through an intermediate seam that then attaches to the bag. Every layer added to that chain is a new failure point. A bartack sewn through four layers sandwiched into a seam looks more substantial than a bartack sewn through one. It is also four chances for the system to migrate, delaminate, or pull through under sustained weight. Count the handoffs.
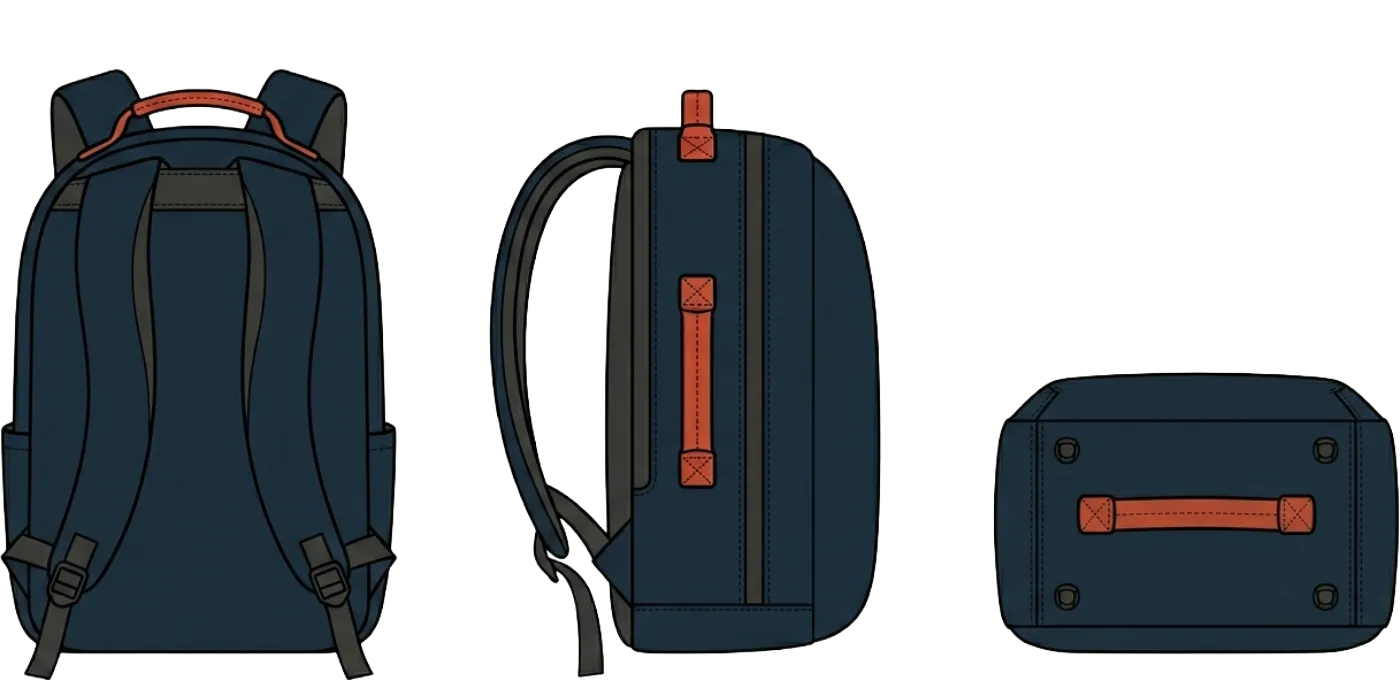
Grab handle anchors take sudden concentrated load. You use the handle to hang the bag, pull it off a shelf, hand it to someone, hook it on the back of a chair. A hard yank with a loaded bag exerts more force than an hour of carry. Both attachment points should be bar-tacked through a dense backing layer. If they feel identical to a standard seam, they were not designed for the load they will take.
Hip belt anchors follow the same logic as the lower strap anchors. Direct attachment to the frame or bag structure. Intermediary layers multiply failure risk at the exact point where load transfer happens most.
Secondary webbing attachment points are where the inspection usually stops, and shouldn't. Compression strap anchors, sternum strap loops, MOLLE rows: run your fingers along every one. Feel for backing layers. Press the fabric around each attachment. The quality of these secondary points tells you whether the manufacturer thought about failure systematically or only at the obvious places.
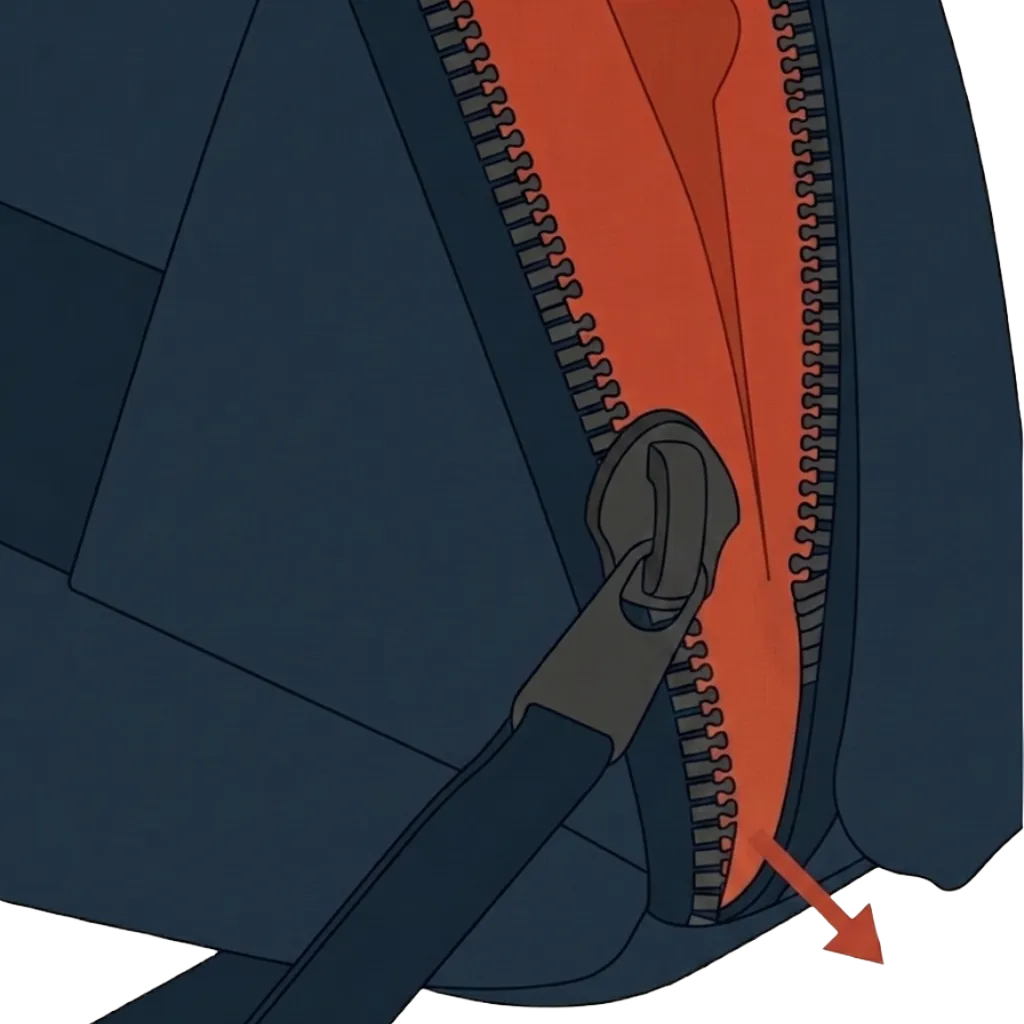
Zipper tape failure is not the teeth. The tape, the fabric strip the teeth are mounted on, separates from the seam allowance under repeated heavy loading. The bag opens even though the zipper runs. Press along the zipper tape on the main compartment while holding the bag taut. A well-built zipper channel has no give. A thin one moves.
The bottom panel is the first surface to show wear and the last place most bags reinforce. It should be heavier or visibly different from the shell. If it's the same fabric as everywhere else, it will wear through first.
The interior liner is the failure most people don't see coming. PU-coated liners break down through hydrolysis. Warm and humid environments accelerate it. The exterior looks fine; the interior becomes sticky, then starts to peel. TPU and waxed textile liners age differently. Check the spec sheet for coating type before buying.
Water is the other failure most bags don't advertise, and it announces itself in the spec sheet if you know the words to read.
"Weatherproof" and "weather-resistant" are deliberate words. When a brand reaches for either instead of "waterproof," that language is a choice. It signals some protection and an inability to survive sustained rain, usually because the seams are still stitched and the zippers are standard. Read the softer word as a spec, not a synonym.
DWR wears off. A bag that beaded water perfectly when new can absorb it a year later. The fabric hasn't changed. The surface treatment has worn away with use and washing, and it can be reproofed when it does.
Upward-facing zippers are the first thing rain hits. On most bags the zipper line sits along the top, directly in the water's path. Zipper guards, offset zippers, and storm flaps all exist to solve a problem the default orientation creates. Their absence isn't a defect. It's a decision about where water goes.
- Find the upper shoulder strap anchors. Look for bar-tacks or box stitching distinct from the surrounding seams. If the reinforcement looks like any other seam, put the bag down.
- Find the lower shoulder strap anchors. Trace the construction back to the bag body. Count the layers between the anchor and the structure. Fewer is better.
- Find the grab handle attachment points. Press them. If they feel like standard seams, they weren't designed for the load they'll take.
- Press along the zipper tape on the main compartment with the bag held taut. It should not move.
- Look at the bottom panel. If it's the same fabric as the shell, note it.
- Check the spec sheet for liner coating type. PU is a liability over time. TPU is not.
This takes sixty seconds. It is the sixty seconds most buyers skip.
The bag meets you halfway. The construction sets the margin; load and time determine when that margin gets tested. You now know how to read the margin before it does.